How to use black and decker coffee maker. The best way to stay hydrated is by drinking a lot of water. Many people find it helpful to pack their water for the day in containers that are easily accessible throughout the day.
As we know, not all coffee makers are made equal so it’s best first by consulting your owner’s manual for questions about the operation of your specific model to understand how parts operate.
How long the manufacturer suggests waiting before you can expect to taste coffee from freshly ground beans and how much water you’ll be using per volume of coffee brewed.
Important elements that come together to make sure each cup tastes good every time include utilizing fresh beans, filling your filter basket properly with ground coffee, and letting gravity do its magic.
By contrast, if you use too little or too much water or wait too long, it may affect whether or not you have enough coffee grounds per your cup size preference and end up affecting the final quality of the product.
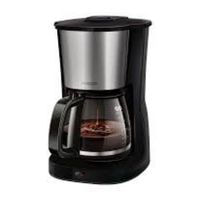
How to use black and decker coffee maker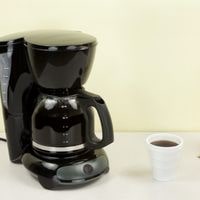
Stanley Black & Decker produces a variety of different coffee makers, so the best place to get answers about the operation of your particular model is in your owner’s manual. According to the manuals that Stanley Black & Decker supplies with most of its products, you’ll need four elements for a good coffee fresh.
Drinkable water fragrant coffee, proper saturation of ground coffee particles within the liquid, and enough coffee solution to wets all those grounds but not overpower them.
Clock-setting
Black and Decker’s coffee makers come with a delay brew function that lets you prepare coffee ahead of time. To prevent problems with your coffee maker, we recommend setting the clock to the correct time of day.
Set up will take longer than usual to complete because this coffee maker does not feature a traditional on/off switch. First, plug the unit into an outlet so that the electricity can be at full capacity.
The display flashes 12:00 once power is reached; pressing the HR button will automatically update it to match the current hour. In a matter of seconds, “PM” appears in the top right-hand corner, indicating it’s nighttime (or late afternoon).
It repeats this cycle every hour from 1 – 12, then back again from 1 – 12. Note that delays do not occur until after hourly updating has finished for each respective time interval.
How to Use the Delay Feature
To program the unit to start brewing at a particular time of day, press the PROG button and select the time you want the brewing to begin, using the same buttons you used to set the time of day.
Once you’ve set the time, the display will flash several times, then revert to the time of day. At this point, press and hold down the AUTO button until 3 beeps sound, which indicates that your brew cycle has been programmed.
Note: If you’re not sure how long your coffee needs to brew before it’s done using a timer-programmed machine like ours is built for as a part of our Delonghi icm10 cap buccinator 10-cup with double-wall stainless steel thermal carafe reviews, follow along with these directions.
The process of Brewing coffee
The brewing of coffee is not a simple affair and there’s more to it than simply adding water. If you want your taste buds to appreciate the subtle nuances in different varieties of coffee, you’ll need to add the right amount of water and have the proper filters in place.
Add cold water up to the appropriate lines that indicate how many cups of coffee you’d like or else you’ll have a big mess on your hands.
Next, put a filter into the filter basket at the top of the machine by pulling down on it firmly until it locks into place. Make sure you’re using filters designed for your machine.
If your model does come with one that’s special for grinding beans, then crumple up some paper towels instead and set them in there when filling with water so as not to clog up anything critical.
The Black & Decker manuals tell customers to use 1 heaping tablespoon per 6-ounce serving of coffee plus more if they want it stronger.
Select the grind setting
If your coffee maker includes a grinder feature, add the number of beans needed to prepare a full pot (for example 10 tablespoons for 10 cups).
Set the bag in place, insert your filter under the lid, and press start. The grinder will do all the work. Remember that if you’re using already ground coffee that it should be set to OFF or it’ll end up getting wasted.
How to Clean Your Coffee Maker
Clean your coffee maker once a week by throwing away the grounds and filter, and washing the filter basket and carafe. You can also fill up the reservoir halfway with white vinegar to prevent scale buildup from hard water, then fill it up the rest of the way with water.
Put a clean filter in the filter basket. Then push the on and off button to start the brewing cycle. Let it fill about halfway, then turn off the machine again and let it soak for 15 minutes before pressing again.
Flush out your coffee maker by running water through it when done. Repeat the process if the vinegar smell is still there after you finish using it or soak longer per the manufacturer’s instructions if needed.
Related Guides