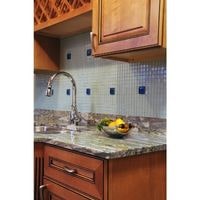
How to remove granite countertops. It’s important to use a work surface that is sturdy under your granite countertop once you’ve removed it.
Keeping it on the ground rather than on top of some other kind of surface can help prevent damage while you take care of other preparations.
After all, if your counter isn’t where it normally would be, the only place for it to go is downward.
Before demolition begins, ensure plenty of hands are on hand to help keep things steady and secure as the countertop removal progresses along its route of breaking and removing chunks one at a time.
Be careful when removing the tops because they are quite heavy and need to be supported with proper caution so as not to break or chip them by accident.
Take advantage of any help that’s offered if you feel uncomfortable doing part or all of the job yourself.
How to remove granite countertops
Removing granite countertops can be done easily with the right tools. In addition to sanding equipment, you will need a pry bar and screwdrivers.
If there is an underlayment of plywood, remove it from the top of the kitchen floor using a scraper or even a wood chisel.
The glue that holds the counter in place uses a solvent-based adhesive.
You are going to want to test different solvents for an appropriate one that does not damage or discolor your countertop before making a final choice about what to use on your project.
To remove granite countertop slabs, follow these steps:
Turn off the water valves
Make sure the water valve under your sink is shut off before any water starts to leak. In addition, turn both the hot and cold water valves clockwise until the water stops flowing for a few seconds.
You can totally disengage your line by turning a wrench or pair of pliers counterclockwise above your faucet’s hot/cold arc handles.
Disconnect the faucets
Trace the lines from your sink to the main water line. This part might require a map because there are likely to be a few doors in between. Turn off the water faucet.
To do this, you need to turn the nuts by hand and remove them entirely so you can get back the spout that was on top of it and clean everything real nice.
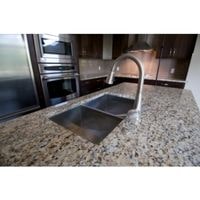
Removing the sink
When removing an under-mount sink, locate the hold-down brackets located inside the cabinet. Remove the nuts from each bracket, and then safely pry out the sink with a chisel or a flathead screwdriver.
Take out the plywood
Below the surface of your countertop, you might have noticed a layer called plywood. To detach it, first, unscrew the screws that connect either one to the other and make use of a drill to take them off.
Next, you’ll need another set of screws that are going into the plywood from the top. If none exist then break down any adhesive moving upward from underneath the countertop until you can slip out the plywood.
Removing the backsplash
Now that the countertop is detached from the backsplash, we can remove it using a pry bar and hammer.
Start at the top of the backsplash and gently pry the pry bar between two grooves on one side until you can release as much of the backsplash as possible.
Repeat this process on both sides of the pry bar until you have removed all the backsplash.
Removing the Countertop
Following these steps, you’re now ready to remove the countertop hassle-free.
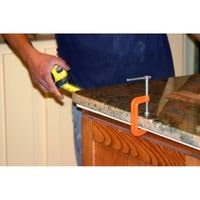
Identify the connection point
A corner should be located between the front brace of the cabinet and the bottom of your countertop. Look inside the cabinet face to find it.
With a hammer, tap the end of the pry bar into the loose joint; then gently pry upward until any glue is broken loose or until you can get underneath the granite down onto plywood if there is plywood there.
If so, remove them together since your plywood platform will now need to be separated from your granite.
If necessary, tap one wooden shim in place on either side of each as they are removed after being lifted off. It might take multiple shims to make things steady enough to lift out.
Continue exploring the cabinets
Move towards the back of each cabinet and use a prybar to lift the granite material that’s covering the top of each cabinet. Add shim as you go.
If removing plywood only, move from left to right and expand your pace along the length of the countertop until the entire thing is lifted out.
If you’re using a granite top, then try moving front to back swinging inwards towards your body across the entire width so as not to crack the entire slab or settle higher on one end than another.
Lifting the countertop from the top
Plan ahead and assign one worker per 3 feet to 4 feet along with the countertop.
Then, work together to slowly tilt the countertop up from the back edge and roll it over into the outstretched arms of your assemblers.
Move onto safety gloves and lift gently before rolling onto a flat surface for storage.
(If you have extra hands on hand, you can try fitting in tighter spaces by using an A-frame or two.)
Granite countertops can be removed
For protection, place the granite with the top down. If the granite is already in place and you’re looking to improve it.
Clean the surface thoroughly with a vacuum and a scouring pad so that the plywood doesn’t stick. If there’s extra glue leftover from installation, use scrapers to get rid of it.
How to remove granite countertops
Related Guides
