How To Level Ground By Hand. For a number of reasons, many homeowners level the ground. Prior to building new homes, some individuals level the land, especially if the property contains hills.
Others prepare the land for new above-ground swimming pools, swing sets, driveways, or patios by leveling it.
Others level the ground in order to grow grass seed, flowers, or vegetable plots. Whatever the purpose, leveling the ground is done in a similar fashion.
How To Level Ground By Hand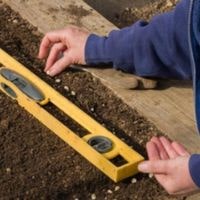
Create a border for the cultivation by outlining your plot with stakes and twine. Place pegs in the ground at each corner of the cultivated area.
Make a hole in the ground. Begin at one corner of your area and dig approximately halfway into the dirt using your shovel. Before continuing to till, use the hoe to loosen any thatch, weeds, or roots found when digging and remove them.
This is a discussion on how to level ground by hand.
Step 1: Remove Grass
If you’re leveling a tiny area, don’t remove the grass. If you need to level a wide area, eliminating the grass will be easier if you start with a clean slate.
To remove the majority of grass being chopped out of your intended space before priming and painting it, all you need is a simple shovel.
Step 2: Adding Ground Cover
Place your ground cover on top. We can recommend a mixture of compost, manure fertilizer, and soil that will produce whatever effect you’re looking for.
Depending on what you’re growing here and what you need the ground cover to be like, whether it’s to hold in moisture or to prevent weeds from sprouting in your pool or shed, for example.
The same is true if you want to use this space for a lawn rather than something else like a pool or a shed.
Step 3: Spreading Topsoil
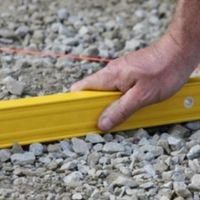
Make sure that the topsoil is spread evenly. Use a garden rake to spread the materials evenly. Make sure you check using your level and measuring tape to see if it’s staying level.
If you have a large area, there are small versions of ground-moving equipment that can help you. Rental companies from local hardware stores will be able to advise as far as what will work best for your property.
Step 4: Tamping Soil
Soil has to be tamped down in order to stop it from shifting after it’s been leveled properly. If one is leveling a small area, you can tamp the soil by inserting the back of your rake into the ground and pushing firmly with your foot until you feel resistance.
For larger areas, or if it is particularly important that the ground be level, you can use a tamper or plate compactor to easily and efficiently tamp the earth down.
Step 5: Allow It To Settle
Allow at least 48 hours, if not a couple of weeks, for the earth to settle before attempting to use the garden.
Also, because you don’t want to be exposed to dangerous pesticide chemicals, it’s usually safer to sprinkle the area and wait for rain.
FAQs
To the level ground, what is your preferred tool?
A pointed or flat-edged spade, a garden fork, and a hoe are all useful digging implements. The first stage in loosening the soil is to cut through firm ground with a pointed shovel.
A flat-edged spade does the same objective, but with a straighter cut around the edge, resulting in a flat area that is easier to level.
Is there anything I can use to flatten my soil?
A leveling rake may assist you in ensuring that everything is nice and flat. Begin by raking in one direction, then the opposite, to ensure that the bigger and smaller particles are uniformly distributed across your grass.
Although raking is not suggested prior to establishing a fresh lawn or garden, some individuals find that it works well on existing lawns.
Related Guides