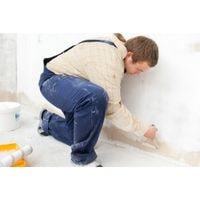
How to fix uneven paint on walls. If your walls are currently uneven, covering the entire surface with a new layer of paint will not fix the problem.
The different levels will still show through the new paint. You’ll have a solid color wall, but it won’t look smooth.
However, you can use methods that both cost little and work! One is to prep work extensively; the other is to use special paints.
While prep-work takes practically all day, specially designed paint is quick and easy to apply for a sleeker look on uneven walls.
How to fix uneven paint on walls
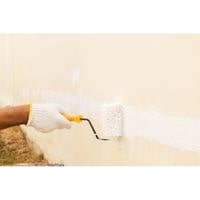
Paint is put onto a surface in one of two ways. It can be spread across it thinly or applied more thickly in some places than others.
Be sure to apply the paint evenly over the entire surface and allow each coat to dry fully before applying the next.
Allow time for each layer of paint to dry completely before applying a base coat of paint.
After the basecoat, apply two finishing coats to ensure evenness and hide brush stroke marks that can appear like stripes if not hidden underneath another layer of paint.
Check out these five simple tips to help your drab space transform into a professional finish, whether you’re adding dramatic color to a muted room or just refreshing your favorite color.
Paint Bubbles Bursting
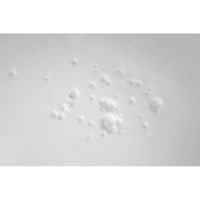
If the first coat doesn’t bond with the undercoat, you may have some bubbles and blisters forming on your wall.
In any case, when you discover these bubbles, it’s important to figure out why they’re there before you start doing anything about them.
In most cases, either a heat or moisture issue causes the bubbles to appear.
On top of that, using paint on a base coat that’s too dry can result in paint bubble formation as well, so making sure both coats are completely dried is important.
Another potential cause might be a customer not cleaning dust and contaminants off before painting which would affect how well the paint bonds together so make sure customers are doing this properly.
Since there could be several different reasons for the problem appearing, it’s best to gently scrape away all the bubbles Sand down the area so there’s a new smooth surface. Painted right over it.
Do An Uneven Paint Coverage
Incorrectly painted walls can look very sloppy. When splattered or peeling paint is a sign of inexperienced work because the coverage was too thin, causing paint to bleed in places into your previous painting job.
Inexperienced painters will often apply one layer of paint over another without allowing the first coat to be fully dried and cured.
This causes unsightly runoff on your second coat by applying too much paint while it’s fresh and wet.
Often using a primer as your first coat can alleviate this problem but make sure you are using the proper roller cover (this can affect the amount of coverage you receive!) and contact your local Paint store if you have any questions.
Remove Any Paint Splatters

Walking into a room and finding paint on the floor or windows can be frustrating.
No worries let the paint droplets dry completely before using a razor blade to carefully scrape off any unwanted spots.
Using a damp cloth, wipe off any paint remaining on the razor blade. You can also use steel wool or any all-purpose cleaner or degreaser to remove any undesired speckles efficiently and quickly.
Keep your tools ready before starting any painting project, and always have a damp cloth handy. Wipe up drips as soon as they occur so that you won’t need to scrape later.
Tails of the Trims
When working carefully around trim, it’s very important to have a damp rag on hand.
This way, if you happen to get paint on the trim (because let’s be honest, that happens a lot more than we’d like), you can use the damp cloth to wipe away the mistake and continue painting.
If you stumble upon an area with dried paint on it that won’t come off even when you rub it, simply sand off the stain and remove any leftover dust particles by using the damp rag to wipe down your surface.
After everything is smooth again and dry(ish), be a little extra sure not to miss any spots in order to achieve complete coverage so that your trim ends up looking glossy and intact!
Remove All Runs And Dripps
Overloading your brush with too much paint or painting over an existing coat before it dries can result in drips.
If this happens, wait until the section has completely dried before painting, then carefully scrape the drips with a paint scraper and sand out the edges with fine-grit sandpaper.
In case there is any overlap from underneath, you can reapply another final coat of paint and shade over it. Be sure to thin out excess wet paint from your brush in the future, as well as use a clean cut-in cup.
How to fix uneven paint on walls
Related Guides