
How to fix spray paint drips. As home improvement projects to automotive applications, spray painting is necessary in order to protect most materials.
If you don’t paint the parts of your car or shed that are prone to weathering or damage.
You will either have to start over with a new piece of material, such as when you need a replacement, or resources might not last nearly as long as they would if they were painted.
In any case, users should come prepared with all of the supplies they are going to need, including everything from adequate ventilation products like respirators and facemasks to protective eye gear and clothing.
How to fix spray paint drips
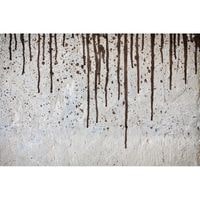
Sometimes, the paint will drift onto areas of your project where it wasn’t intended.
This can happen even when you think you’re doing everything right.
When the paint has dried, lightly sand the area with a fine-grit sanding block to smooth it over and even out the surface for another coat.
You’ll be pleasantly surprised at how great that drippy paint spot looks once all is said and done.
Wait for the Paint to Dry
Once you know about a mistake, you should never jump in to try to fix it right away.
Instead, give yourself sufficient time to learn from the situation and let your mistake be.
Make sure you have time to make it worse by being too hasty and impatient.
Give yourself ample time to assess the situation fully and have everything at least dry enough that when you do decide to repair the issue, your chances of making things even more disastrous will be reduced.
Wet Sanding
Once the paint is completely dry, sanding becomes necessary. Sanding removes and reapplies a new layer of paint, giving your base coat a fresh new look and feel.
You’ll want to use wet or dry sandpaper with an ultra-fine grit such as 1,200 or higher.
Make Sure the Surface is Clean
Wet sanding is an important step in priming because it ensures that all the imperfections are removed. However, there’s one more thing we need to take care of before we finish this prep work.
The key here is to make sure the surface is clean and free of any dirt so it won’t prevent our paint from adhering correctly.
Anything that hinders the paint’s ability to stick will end up putting you right back at square one which means starting anything over again.
Apply a Coat of Primer
After the wet sanding phase, if you have any bare parts of your object that need to be covered during the paint filling phase, then you’ll want to apply a coat of primer to ensure that the paint sticking and getting even coverage.
If you’re not at this stage yet (in other words, you still have paint on your entire project) then apply it like spray-paint by first reading the instructions.
Hold it at a distance of 12 inches from your surface while applying primer in even strokes moving relatively fast starting at one side to the next until you get to the other edge. Allow it to fully dry.
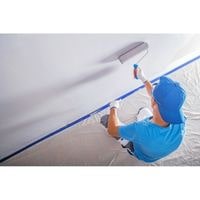
Apply the Paint
Now that your paint job is done, you’ll want to prime the surface. The purpose of priming a surface is to give the new paint something to stick to and prevent things like cracking and chipping.
For maximum effectiveness, make sure your next coat is applied about twenty-four hours after you first primed the surface with a primer.
This will allow enough time for the primer to set properly onto your current painting job so it can effectively protect it from wear as well as discoloration in the long run.
Applying the paint can make you eager to move on, but don’t skip this crucial step – waiting for the paint to dry.
Otherwise, you’ll only end up trying to apply more paint over already-dried sections, ultimately resulting in an uneven finish that’ll give your project a flawed appearance.
Add Additional Coats

When applying paint or any type of coating to a surface, it’s important that coats be thin and even over the entire surface.
In order to accomplish this, apply light coats with even hand pressure and allow ample drying time between each application.
How to fix spray paint drips
Related Guide