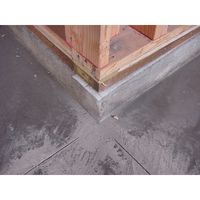
How to cut Quarter Round. A quarter round is a molding that fills the gap between a wall and the floor, as opposed to simply placing a flat floorboard on top of a carpet that creates a visible gap.
Quarter rounds are usually made of wood, such as oak or pine, and are good for homes with laminate flooring, ceramic tile, bare concrete, or vinyl tiles when the old carpet is removed because cheap wooden quarter rounds can be replaced with better-quality ones later which is easier than changing baseboards.
How to cut quarter round
Quarter round is a thin, rounded molding that works well for a number of trim projects. It’s affordable, attractive, and requires the use of tools not normally found in your toolbox.
The corners however are where you’ll need to be very careful with how you cut them so that they come out perfectly smooth.
To do this you’ll want to watch this handy tutorial on quarter rounds to ensure that you get the job done right.
You will need the following items
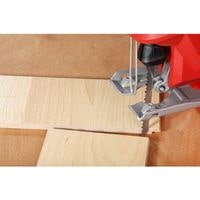
There are several different ways to cut quarter rounds in a pinch. While it’s not ideal, you could use a jigsaw or a miter saw if you had to.
However, the easiest and most accurate way to cut quarter rounds is with a miter saw. Here’s what you’ll need:
- Miter Saw
- Tape Measure
- Carpenter’s Pencil.
Measuring and Marking
If a rectangular (quarter-round) molding is needed for the desired corner, measure it with a measuring tape.
Make sure to note whether the cut is an inside corner or outside corner, which will determine the setting on the miter saw.
An inside corner is a corner where the corner turns into the form of the room enclosure. An outside corner is where the corner turns around the wall into another area of your homes, such as another room or hallway.
Indicate the places where your quarter round will need to be trimmed with a pencil.
Choose Angle and Direction
Secure the quarter-round molding by placing it on your miter saw with what is going to be the long edge in contact with the fence or backstop.
Make sure that its flat surface is resting against this surface and that the rounded portion is leaning outward from you.
Before proceeding, consult your owner’s manual so as to choose a blade angle setting for the workpiece, which allows the slice which will be made in the corner piece to shed onto a suitable backboard.
For example, if you have a 90-degree corner, place the half-round molding on your miter saw so that exactly 45 degrees of it is hanging out from the edge of the table.
If it is an inside corner, rotate the piece slightly to the left or right.
Blade Setting and Start Cutting
Lower the powered-off blade down to the molding. Adjust the placement of the molding so that it is exactly in line with the mark that you made earlier as illustrated.
Secure the wood properly so that it does not move by using clamps or brackets and tighten them. Simultaneously.
Make sure your cut is exactly three inches away from the corner of the said molding at a 90° angle in front of where it meets the such a winged corner of your material and is right on target by making use of a few other tools including a ruler or even a needle.
After this, turn on and lower your saw slowly and wait till you are only about one centimeter above where you want to make your cut before slowing going even slower till it finally goes through your material.
Related Guides