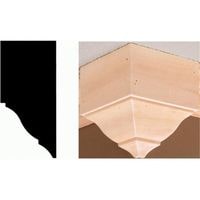
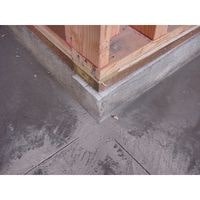
How to cut outside corner trim. For purposes of trim molding installation, an “outside corner” doesn’t mean a corner that’s outdoors. It means a corner that juts out into a room, as on the edge of a chimney or cabinet.
Cutting an outside corner in trim molding is Identical to cutting an inside corner, involving two pieces cut at 45 degrees to combine for a 90-degree angle.
The difference is that an outside corner requires the 45-degree cuts to be in the opposable direction as those of an inside corner.
How to cut outside corner trim
 There are many ways that can help you to cut the outside corner trim. You will be able to find below the explanations of how these work by following steps by step.
This gives an overall description of the scenario about the process of attaching them together to hold up for shape for the house.
So make sure you read it properly and follow all the images mentioned in this link as it is indexed below:
Measure the corner trims
The very first thing that you need to do is to determine the area of a corner trim piece. Next, measure the mark made by different points in each corner of the room. A measuring tape can be used for this purpose.
Measure the distance between the outer edge and wall adjoining to it. Measurement can be taken from three sides. The measurement value must be the same if you want your project done without any flaws.
Mark the corner trim wood
After you have taken accurate measurements, it is time to make the necessary markings. To do this, use a pencil that can be erased later.
When you are done with the initial measurement markings, you will now have to move on to cutting the corner trims according to your specifications.
Prepare the wood piece
Now, place the corner trim piece near the blade of the miter saw table that you intend to use. Place it so that it’s positioned in such a way where you can see how it will be installed.
Make sure that you have placed the wood trim piece near the edge of the blade to obtain optimal results from your operation.
Adjust the saw blade to 45 degrees
Now you need to turn on the miter saw in order to cut down the wood of the corner trims.
However, make sure to set the blade at a 45-degree angle inwards so that it matches up with the marking of your measurement that you have taken and made on the wood of your corner trim earlier.
Wear safety gloves and eye protection to ensure your hands are safe while doing so, but also be careful and avoid any accidents.
Measuring the wood and its side
To begin, mark the first corner. Then, measure out from it the length of the adjoining wall. Lastly, make your second mark allowing you to carry out the plan of action you’ve got in mind for the space between them.
Cut outside corner trim wood
Place the outside corner trims accordingly and nail them. You can use a brad nailer to secure the nails. Make sure you put one nail on every foot. It will give good support when you’re properly supporting your trims.
And that’s how you install outside corner trimming that gives you an easier process of installation overall.
However, be careful to measure everything because otherwise it won’t turn out right and all your hard work would be wasted.
How to cut outside corner trim
Related Guides