
How to build a door jamb. Door frames are generally made up of a vertical side jamb paired with a slanted or horizontal head jamb.
Both can be used to form the structural support for your door, considered a pre-hung door when both are already attached beforehand.
You can build the wall to create your own pre-hung doors by measuring the doorway, then purchasing your own vertical and horizontal components from your local hardware store and installing it yourself if you choose to go that route.
If you’re building a custom door, buying the materials separately will take you more time than creating one out of an entire frame built separately but with less variety in style.
How to build a door jamb
Door jambs can be installed by anyone. The top piece of metal is attached to three others.
It is beneficial to hire a professional when it comes to building your own jambs because you can have doors that cost less than pre-installed doors.
To determine the threshold expansion gap, measure the width and height of the door.
Materials for Jamb
If you’re using standard-sized doors and jambs then you can also opt for pre-made materials that fit whatever height or width you need.
But if you’re planning to use your doors in a custom application such as repairing the frame of a patio door, make sure the jamb you select is thicker 3/4 inches is best so that it can accommodate a full-sized door with hinges.
The thinnest jamb material possible will only be able to fit smaller-sized frames which is why we’ve opted for a non-standard 3/4 inch measurement here instead of 3/8 inch.
Measuring Jambs
The first thing you need to ensure when you build a jam that must fit into a wall is that your measurements are accurate.
In the event that they are not, a problem would arise at some point during the woodworking process.
A door jamb usually measures between 4 9/16 inches and 5 3/8 inches. If that doesn’t happen to be enough.
Then you should start by ripping either a 5- or 6-inch material so as to make room for ¼ inch on either side, which any one of these pieces can be cut in half and used for each side.
Make sure you measure correctly and rip the lumber correctly so as not to end up with an uneven gap at the bottom of your frame which would throw off your door measurements.
Take extra care as well when adding components like hinges and strike plates, but also if you are planning on adding a lock or deadbolt mechanism because this could end up interfering with all these other parts eventually.
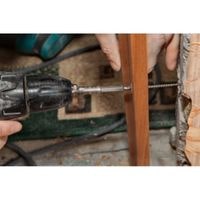
Hinges Installation
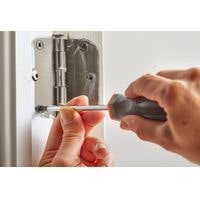
To install your door hinges, if they are not already in place, use a tape measure to ensure the hinges are symmetrical.
A hinge should be placed approximately 5 inches from the top of the door and one more positioned around 5 inches from the bottom.
If you have a lightweight interior door, you may need only two hinges with one at each end. Once your side jamb has been secured in position.
Either by it into place or nailing it for extra support depending on how pliable your material is, draw around the outlines of each of the corners of your doorframe so that you know where to cut or chisel out an area for each hinge to fit snuggly.
If you’re handy with tools, this can be done quickly and easily using a router or chisel but otherwise, do-it-yourselfers will most likely find themselves taking their time cutting carefully by hand.
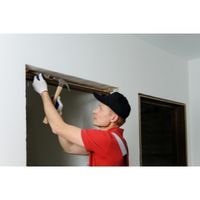
Build the jambs
Put the head jamb over the tops of the side jambs. For each side jamb, secure the head jamb with two or three screws 1 1/2-inches long. Wherever possible, make sure your materials are of a consistent width.
When complete, you should have a door frame without a bottom piece. Install the door inside the jamb frame by assembling the hinges and hanging it on the doorframe with no problem whatsoever.
Install the door unit
Place one end of the door into the rough opening, centered above the rough sill.
Tap a few wood wedges between the door and jamb with a hammer and place them to hold the modern door in place.
The wedges should act as spacers. Double up on wooden wedges if needed to keep the prehung door from tipping into the hole in which it rests.
Remove any excess wood with a handheld scraper tool or a utility knife, making sure that you do not squish or pinch your fingers when cutting off the excess wood.
Check that the new solid door is plumb (level) make sure it sits flush on both sides equally.
Doorstops and hardware should be added
A pre-made doorstop molding can be a great option to add some detail around your door and create the perfect tight seal.
Whether your door is new or old, doorstop molding will give it an instant facelift and make it look custom from top to bottom.
Doorstop moldings have a flat edge to them which makes for the perfect fit if nailing them into place before installing your door.
The shape of the lip that comes with this type of molding is what creates a tight seal for your door if installed correctly.
How to build a door jamb
Related Guides